
Oh boy this was an interesting one to make.
It wasn’t necessarily difficult, it was more the fact that I wasn’t 100% in the mood to be making a cake, plus I couldn’t find anything in my parents kitchen. It was as if my mother had decided to hide all the utensils and ingredients that she knew I would need in the most random of places. Anyway, we got there in the end.
Last Monday was Blue Monday, otherwise known as the most depressing day of the year, apparently. It was decided in work that we would have a baking competition, with the idea being that all the baked goods would be blue, or have an element of blue. Which led to me cooped up in the kitchen the day before, searching for utensils when really I wanted to be binge watching Marie Kondo (I adore her).
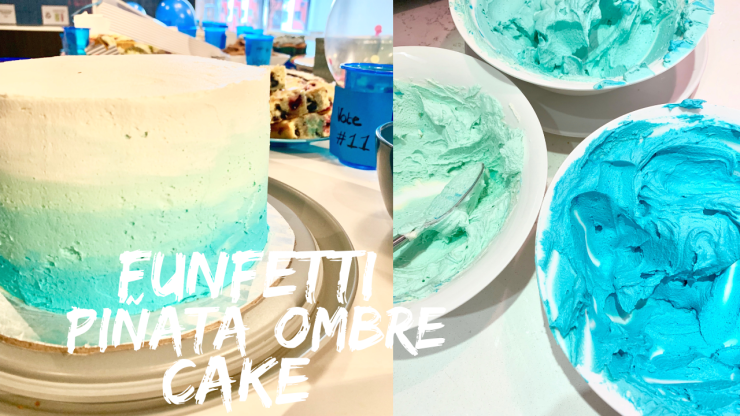
Me being me, I also had to make things difficult for myself. I have never made a funfetti cake before this. I have never made a piñata cake before this. I have also never attempted ombré icing. Genius idea Katie. Try all three at once. That’ll be a cinch.
I tried this funfetti recipe from Baked Bree, which made me crave baked brie. It was a simple recipe to follow, the only difference is I used smaller pans to bake with. I believe Bree recommends 9 inch pans, but I used 6 inch pans instead resulting in four layers. One negative of doing this is that the layers weren’t as thick, so it was hard to see the colours of the funfetti clearly in my version. But they did bake faster, taking about 20-22 minutes.
For the piñata part, I didn’t bother looking up a recipe as I’ve been on Pinterest long enough to know what to do. I bought bags of Smarties and Crispy M&Ms and separated out the blue ones. Top tip if you’re going to do this, I got a lot more blue out of the two Crispy M&Ms bags, so maybe nix the Smarties. When assembling, I simply cut a hole into three of the layers and left one layer in tact. I then put one layer on my cake tray, added my icing, another layer, more icing, another layer, more icing. At this stage, the three holes were lined up and I could pour the blue chocolates inside. The I just popped on the top layer which was the layer without a hole, and continued icing.
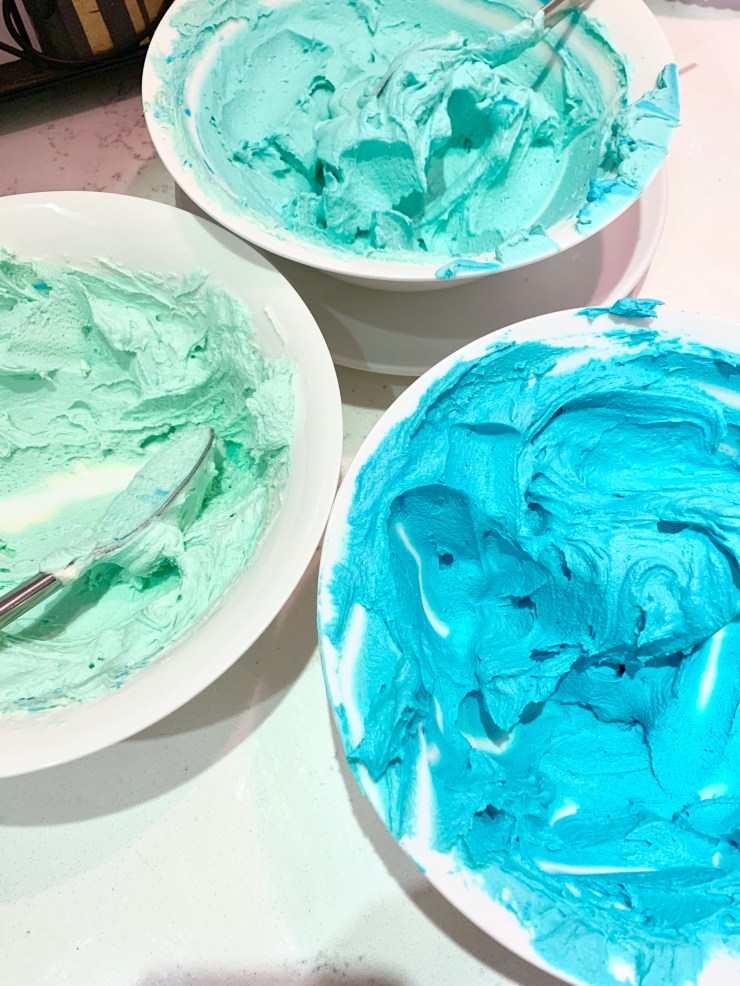
For my icing, I used the following recipe from Chef in Training. I ended up making a double batch because I wanted to be sure that I could ice the entire cake. We ended up with a good bit left over, but I’d prefer that than too little. Once my buttercream was made, I separated it into four different bowls. This is so I could get to work on the ombré colour.

Again, I didn’t have a clue what I was doing, so I kind of winged it and loosely followed images of cakes from Pinterest. I’ve spent enough hours watching people ice cakes on Instagram to know what to do. (Sidebar: how relaxing is it watching people ice cakes?! I could honestly watch for hours!). I got paste concentrate to create my blue colours. The one I used is Sugarflair in Sky Blue and Wilton White Icing Colour. I use the white colour as butter will inevitably make your icing look yellowish, which is not cute, so a little white icing drops helps make that top layer nice and bright. In the first bowl I put the white icing with the buttercream. In the second bowl I put a dab of the sky blue colour. In the third bowl I doubled the amount of sky blue. In the fourth bowl I tripled it. I messed around with them a little more, tweaking until I thought there was a nice range of colour.
I used this icing for between the layers, starting with the darkest blue and working up to white, then for the crumb coating, and then for the final ombré icing. You can see in the video above how I went about it. I think for a first attempt it turned out pretty good!
Any nice cake recipes, send them my way! I’m going to be making my great aunt’s 90th birthday cake later this year, so I want to get the perfect recipe. She’s a big fan of lemon, so if you have any show-stopping lemon cakes, pop the link down below!

Leave a comment